Q: I just deleted a file by mistake, how do I recover it?!
A:
If you’ve just deleted a file and immediately had that split second where your heart stops as you realize that the file you just deleted was one you meant to keep, then you can take a deep breath; there’s a good chance that you can recover deleted files without needing assistance from your weird cousin or seeking out the best IT Support Melbourne wide (that would be us) for professional data recovery.
The Good News: Windows users should be able to recover the deleted file from trash, however, if you emptied the trash bin, there are simple steps that you can take to undergo data recovery by yourself. All you need to do is follow our step by step guide below.
More Good News: If you’re not using Windows or if your missing file was deleted from a USB or a memory card, while recovering from the Trash Can isn’t an option for you, the following data recovery method will usually be enough to recover that deleted file.
Of course, you may need to seek professional support if the file you’re attempting to recover is highly sensitive, time critical or just plain important. Forensic data recovery is best left to the experts and they can usually assist through either remote or onsite computer support.
Using Recuva To Recover Deleted Files
Recuva is a wonderfully simple data recovery program designed for the everyday user to recover deleted files. Use the link above and download the program as per the instructions, follow our guide below for the installation.
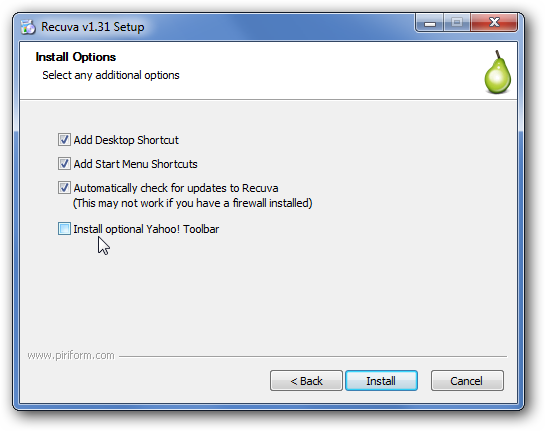
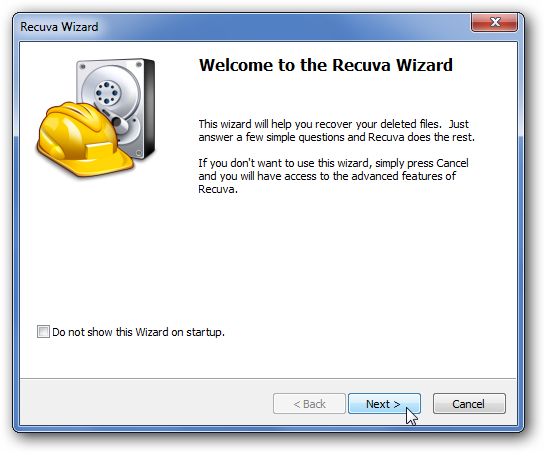
Once the software is downloaded, you’ll need to launch the wizard and work through the process of salvaging your file/s.
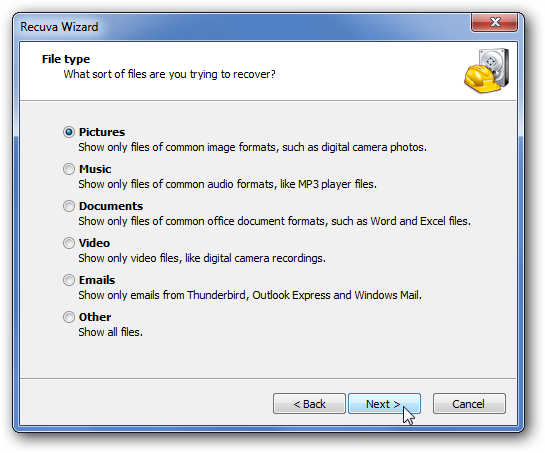
The first part of the process requires you to select exactly what type of file you’re looking for. By doing this, you will save a LOT of time, rather than letting Recuva sort through everything it encounters, narrow the search by telling it you’re looking for a specific type of file. In our example, we’re going to recover a photo.
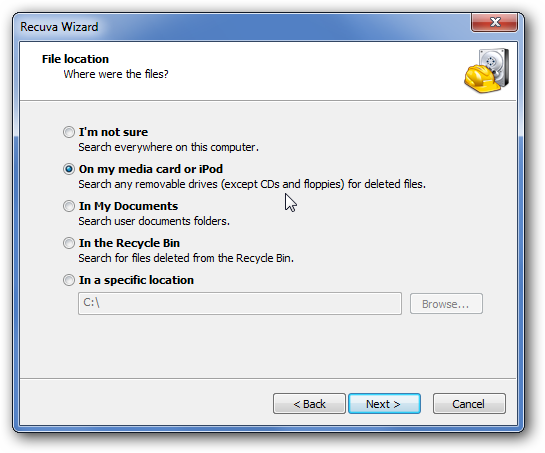
After you’ve selected the type of file you’re looking to recover, you’ll need to identify where it was deleted from so Recuva knows where to go looking. In our example, we’re trying to salvage a photo that was deleted from an SD card, so we’ve ticked the box that applies to our case. If you’re wanting to locate a file that you deleted from your Recycle Bin, you’d select that option and so forth.
At this point, Recuva will ask what kind of scan you want to run – quick or deep. We suggest that the first time around, you use a normal scan, the reason for this is that number 1, it’s quicker and 2, you’ll find that 9 times out of 10, your file can be recovered via the quick scan, so don’t waste time running a deep scan (which takes considerably more time) the first go, chances are, you’ll recover your file just fine, so only run the deep scan if the quick version doesn’t work.
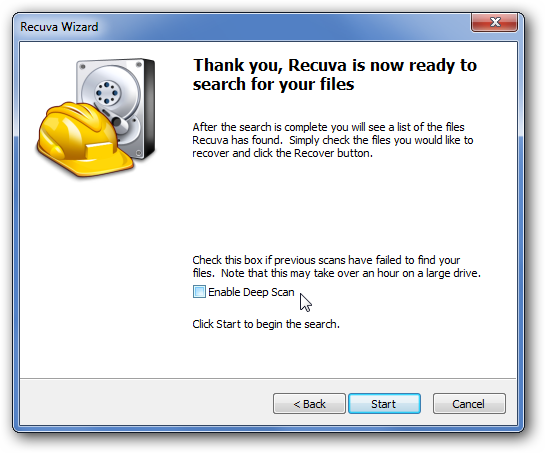
Once Recuva has finished scanning, it will display all of the particular file type you told it to search for that it located, once you’ve found the file you want, click to select and then right click and select ‘Recover Highlighted’.
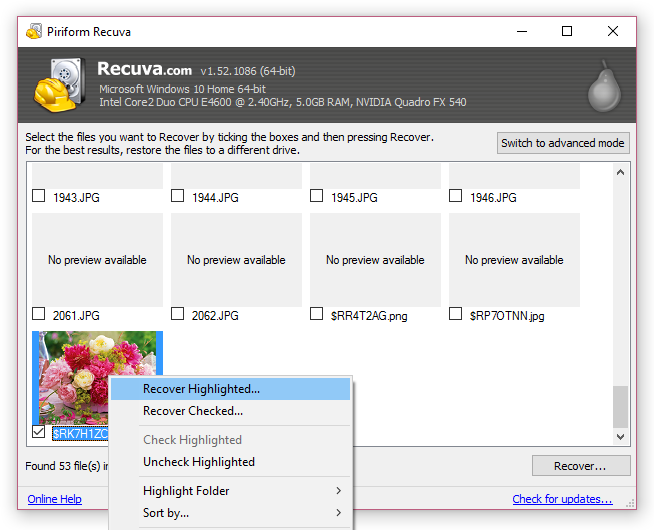
As you can see from our screenshot, sometimes the files don’t have a preview available, but if you think there’s a chance that the file you’re after is one of those with no preview option, I would suggest recovering all of those files and then re-deleting the ones I didn’t need, but only once I’d located the file I did want to keep.
If the file I wanted wasn’t in amongst those files, I would return to Recuva and run a deep scan to locate my file, before I deleted those ‘preview-less’ files, because I wouldn’t want them coming up again in the deep scan.
If you’ve got a lot of preview-less files to shift through and you know when the file was created, you can always click on ‘Advanced View’ and sort the results by modified / created time in order to narrow down your results further. This is a big help when there are a lot of recovered files because rather than digging through page upon page of recovered files, you’re cutting out those that you know don’t fit the time frame the files was created.
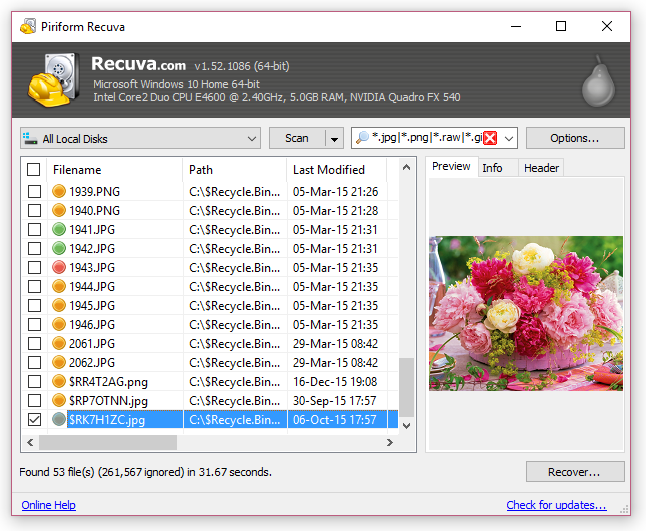
Once again, if you’ve found the file (or files) that you were looking to recover, click to select then click the ‘Recover’ button. Do make sure that you save your newly recovered file to a new location on your hard drive to avoid complications with any future recovery efforts and you’re done!
As discussed earlier in this article, if you can’t recover deleted files using the quick scan option, repeat these steps but make sure you select ‘deep scan’ when the option is there.
While there are many other data recovery programs available to help you in recover deleted files, Recuva is free and very easy to use. If this solution doesn’t work or you’d prefer to have a professional recover your deleted files, then
contact us for professional, cost-effective
IT support Melbourne-wide.
Our
Computer Geeks at IT WiFi are your one stop destination for all your
IT Support Melbourne needs. Contact us for computer repairs Melbourne and
Mac repairs Melbourne
 Once the software is downloaded, you’ll need to launch the wizard and work through the process of salvaging your file/s.
 The first part of the process requires you to select exactly what type of file you’re looking for. By doing this, you will save a LOT of time, rather than letting Recuva sort through everything it encounters, narrow the search by telling it you’re looking for a specific type of file. In our example, we’re going to recover a photo.
 After you’ve selected the type of file you’re looking to recover, you’ll need to identify where it was deleted from so Recuva knows where to go looking. In our example, we’re trying to salvage a photo that was deleted from an SD card, so we’ve ticked the box that applies to our case. If you’re wanting to locate a file that you deleted from your Recycle Bin, you’d select that option and so forth.
 At this point, Recuva will ask what kind of scan you want to run – quick or deep. We suggest that the first time around, you use a normal scan, the reason for this is that number 1, it’s quicker and 2, you’ll find that 9 times out of 10, your file can be recovered via the quick scan, so don’t waste time running a deep scan (which takes considerably more time) the first go, chances are, you’ll recover your file just fine, so only run the deep scan if the quick version doesn’t work.
 Once Recuva has finished scanning, it will display all of the particular file type you told it to search for that it located, once you’ve found the file you want, click to select and then right click and select ‘Recover Highlighted’.
 As you can see from our screenshot, sometimes the files don’t have a preview available, but if you think there’s a chance that the file you’re after is one of those with no preview option, I would suggest recovering all of those files and then re-deleting the ones I didn’t need, but only once I’d located the file I did want to keep.
If the file I wanted wasn’t in amongst those files, I would return to Recuva and run a deep scan to locate my file, before I deleted those ‘preview-less’ files, because I wouldn’t want them coming up again in the deep scan.
If you’ve got a lot of preview-less files to shift through and you know when the file was created, you can always click on ‘Advanced View’ and sort the results by modified / created time in order to narrow down your results further. This is a big help when there are a lot of recovered files because rather than digging through page upon page of recovered files, you’re cutting out those that you know don’t fit the time frame the files was created.
 Once again, if you’ve found the file (or files) that you were looking to recover, click to select then click the ‘Recover’ button. Do make sure that you save your newly recovered file to a new location on your hard drive to avoid complications with any future recovery efforts and you’re done!
As discussed earlier in this article, if you can’t recover deleted files using the quick scan option, repeat these steps but make sure you select ‘deep scan’ when the option is there.
While there are many other data recovery programs available to help you in recover deleted files, Recuva is free and very easy to use. If this solution doesn’t work or you’d prefer to have a professional recover your deleted files, then contact us for professional, cost-effective IT support Melbourne-wide.
Our Computer Geeks at IT WiFi are your one stop destination for all your IT Support Melbourne needs. Contact us for computer repairs Melbourne and Mac repairs Melbourne